
Take full advantage of Automate Shipping Profiles by adding custom Shopify shipping profiles to your Shipping and delivery settings.
How It Works
To use Automate Shipping Profiles, your Shopify store must have at least two shipping profiles.
According to Shopify, "A shipping profile is a set of shipping rules for specific products and locations." By default, Shopify includes a general shipping profile, but you can create one or more additional custom profiles for groups of products that require different shipping rates.
For example, if you dropship products from multiple vendors and each vendor has its own shipping rates, you can create a shipping profile for each vendor. If a customer orders products from a single vendor, they'll be charged the shipping rate for that profile. If they order products from multiple vendors, Shopify combines the shipping costs from each applicable profile into a single shipping charge at checkout.
Profiles are set up in your Shipping and delivery settings, then synced with Automate Shipping Profiles. This guide will show you how to add custom profiles in Shopify and import those profiles to Automate Shipping Profiles.
Once you've set up profiles in Shopify and synced them with ASP, products can be automatically sorted to the correct profile using Profile Conditions and Bulk updates.

Learn more about Shopify shipping profiles here.
Add A Shipping Profile
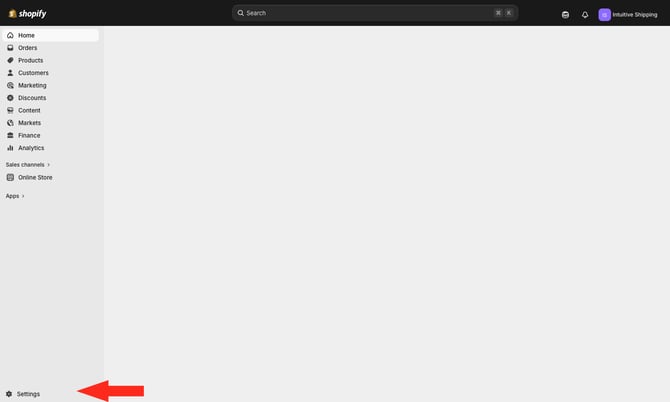
1. From your Shopify admin page, click Settings at the bottom of the left sidebar menu.
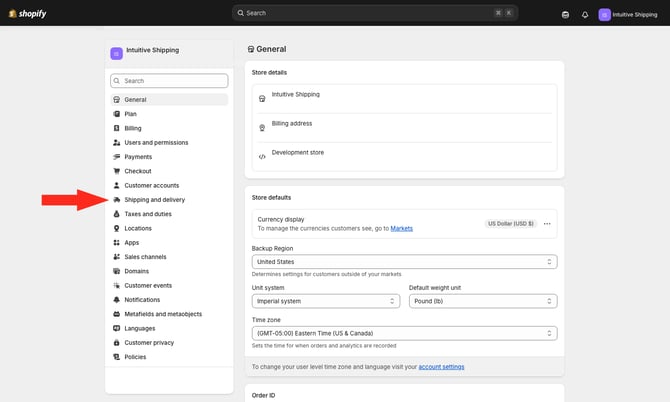
2. In the Settings menu, click on Shipping and delivery.
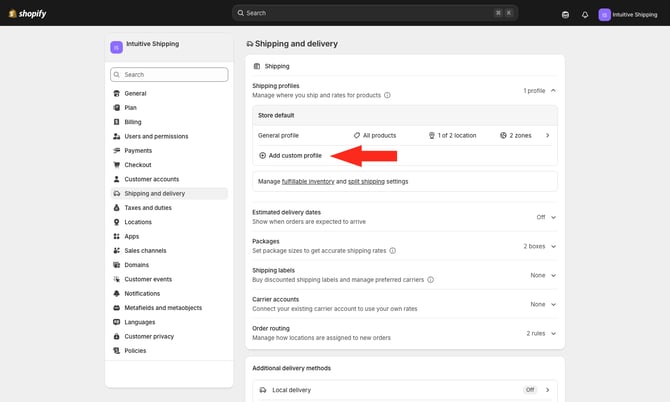
3. Under your default 'General profile', click Add custom profile.
4. Enter a profile name for your custom profile, such as 'Shirts & Hoodies'.
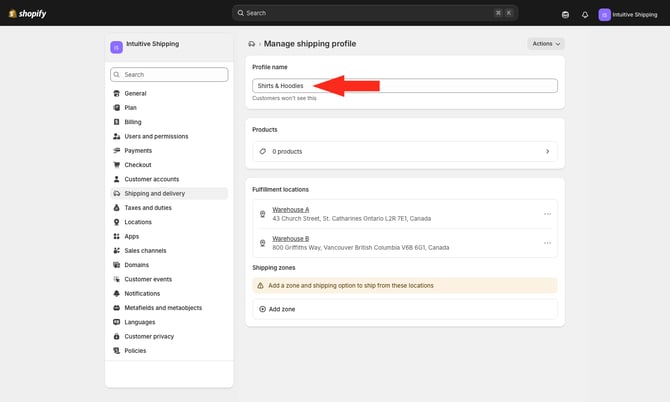
Each profile must be associated with a Shopify shipping zone.
5. Click Add zone.
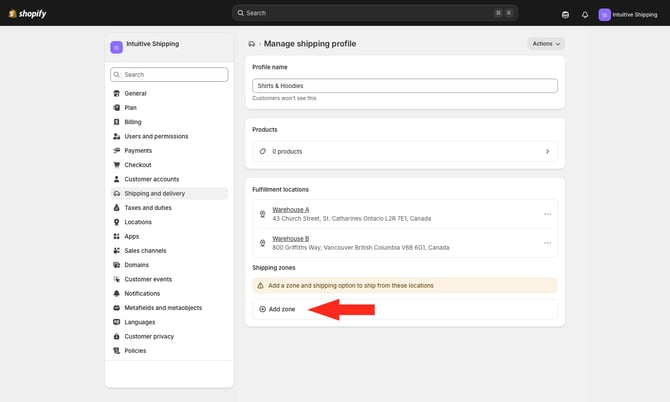
6. Follow the prompts from Shopify to name and select a shipping zone, such as 'Canada'.
7. Repeat Steps 5 and 6 to add more shipping zones to your custom profile.
Each profile much have its own shipping rate.
8. Click Add shipping option to add a rate.
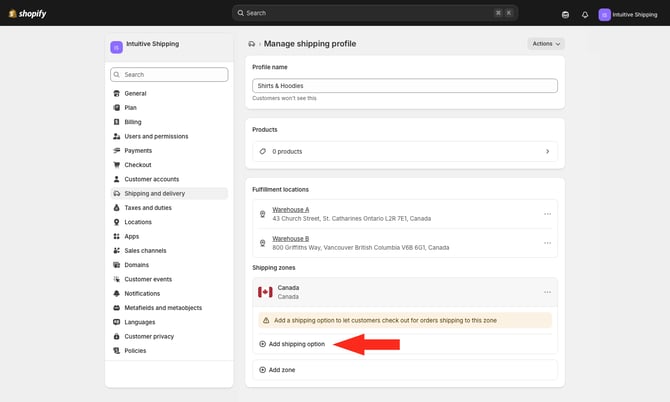
9. Follow the prompts from Shopify to set up your shipping rate.
10. Click Save on the main Shopify menu bar to save your custom profile.
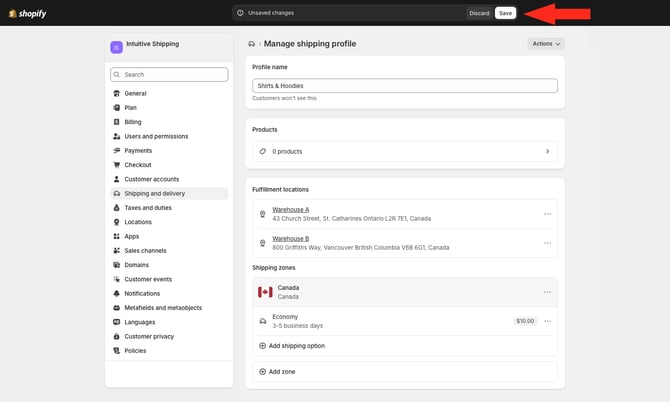
11. Repeat Steps 3 to 10 for each additional custom shipping profile you wish to add.
Import Changes to ASP
Once you've configured your custom shipping profiles, you'll need to sync them with Automate Shipping Profiles.
1. Return to Automate Shipping Profiles.
2. Click Settings on the main menu.
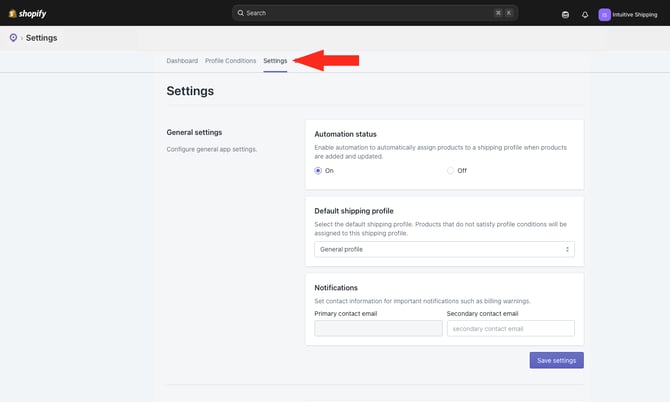
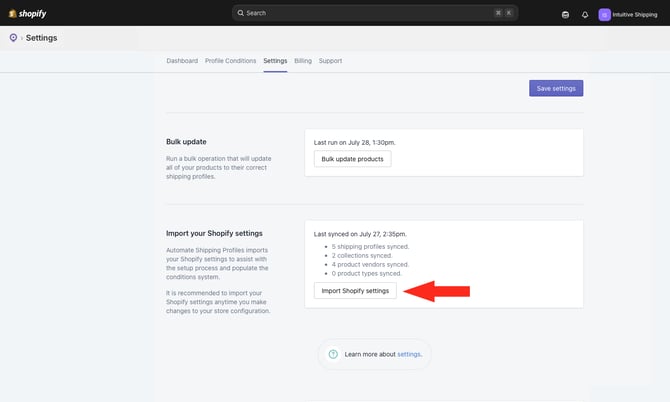
3. Scroll down to Import Your Shopify Settings.
4. Click the Import Shopify settings button.
You can continue using Automate Shipping Profiles while the import is running. However, we recommend waiting until the sync is complete before making any changes.