
Contents:
Profile Conditions automatically assign products to your predefined Shopify Shipping Profiles, eliminating the need to sort products manually. This saves time, keeps your Shipping Profiles organized, and helps ensure your customers are shown the correct shipping rates at checkout.
How It Works
Profile Conditions can be configured using a variety of product criteria, including collection, product type, tag, vendor, price, weight, and more. For greater flexibility, each Profile Condition can include multiple rules. For example, you can create a Profile Condition that matches products from a specific vendor with a particular product tag and assigns them to the same Shopify Shipping Profile.
If you have multiple Profile Conditions, you can also set their priority. When a product matches more than one Profile Condition, the highest-priority condition determines which Shopify Shipping Profile the product is assigned to. This is useful if you have general Profile Conditions that are used year-round, but want to temporarily prioritize products for seasonal promotions or assign them to a dedicated holiday Shipping Profile.
Shopify Shipping Profiles must first be created in your Shopify settings and then synced with Automate Shipping Profiles before products can be assigned to them.
Learn more about Shopify’s Shipping Profiles feature here.
Add A Profile Condition
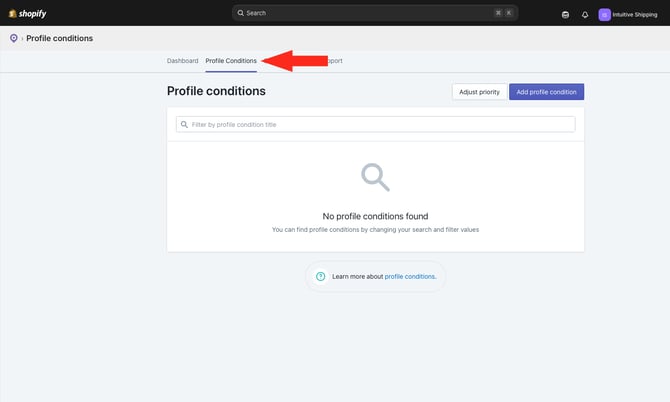
1. Click Profile Conditions on the main menu.
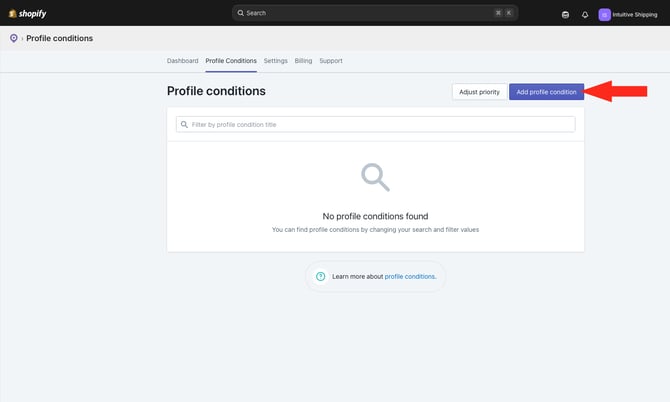
2. Click the Add Profile Condition button.
3. Enter a title for your Profile Condition,such as 'Shirt's.
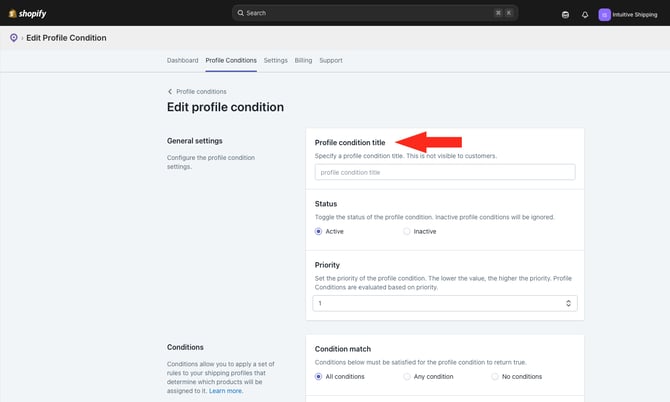

Profile Condition titles are not visible to customers.
4. Select the Status of your Profile Condition.
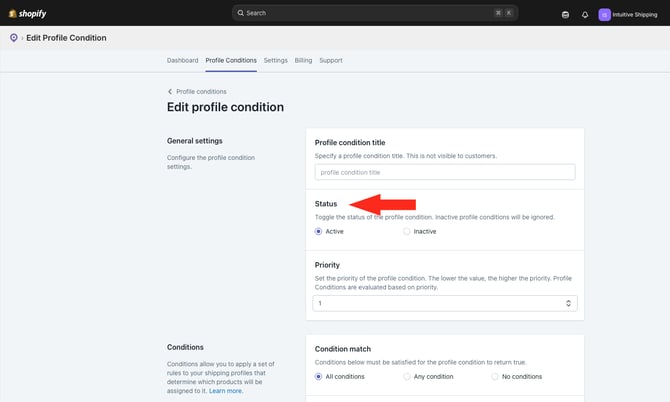
Your have two settings to choose from:
- Active - the Profile Condition will be used for sorting when automation is enabled, based on its priority level.
- Inactive - the Profile Condition will be ignored when automation is enabled.
5. Select the Priority of your Profile Condition by typing a number into the field or by using the up/down arrows to select a number.
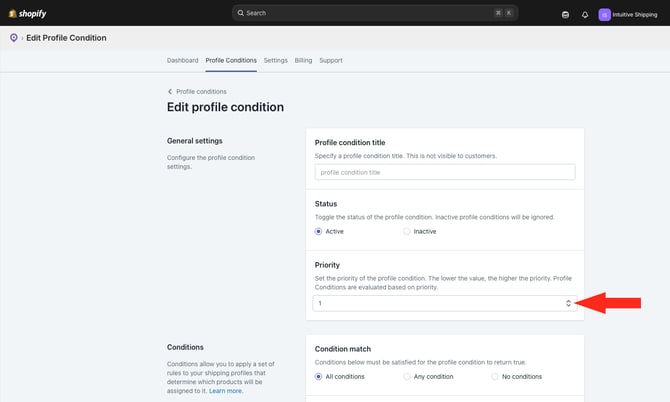
Higher priority is given to lower numbers. 1 is the highest possible priority.
Conditions
1. Select a Condition match.
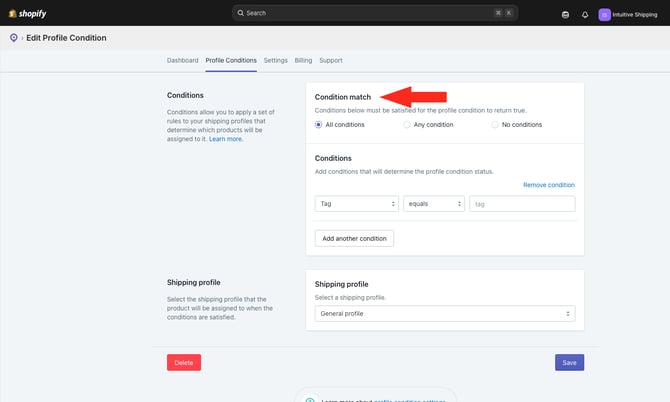
You have three settings to choose from:
- All conditions - All of the conditions being added in the following steps must be satisfied for products to be sorted into the Shipping profile selected in Step. This is the default setting.
- Any condition - At least one of the conditions being added in the following steps must be satisfied forproducts to be sorted into the Shipping profile selected in Step.
- No conditions - None of the conditions being added in the following steps must be satisfied for products to be sorted into the Shipping profile selected in Step.
2. Select a condition type.
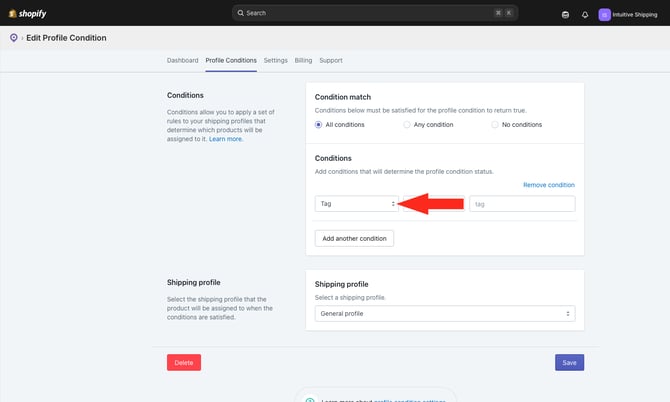
You have ten settings to choose from:
- Collection - Products are sorted into Shipping Profiles based on the collection selected in Step 4.
- Vendor - Products are sorted into Shipping Profiles based on the vendor selected in Step 4.
- Type - Products are sorted into Shipping Profiles based on the type selected in Step 4.
- Tag - Products are sorted into Shipping Profiles based on the tag entered in Step 4.
- Title - Products are sorted into Shipping Profiles based on the title entered in Step 4.
- SKU - Products are sorted into Shipping Profiles based on the SKU entered in Step 4.
- Stock - Products are sorted into Shipping Profiles based on the quantity in stock entered in Step 4.
- Price - Products are sorted into Shipping Profiles based on the product price entered in Step 4.
- Weight - Products are sorted into Shipping Profiles based on the product weight entered in Step 4.
- Metafield - Products are sorted into Shipping Profiles based on the product metafield key and value entered in Step 4.
3. Select a condition operator.
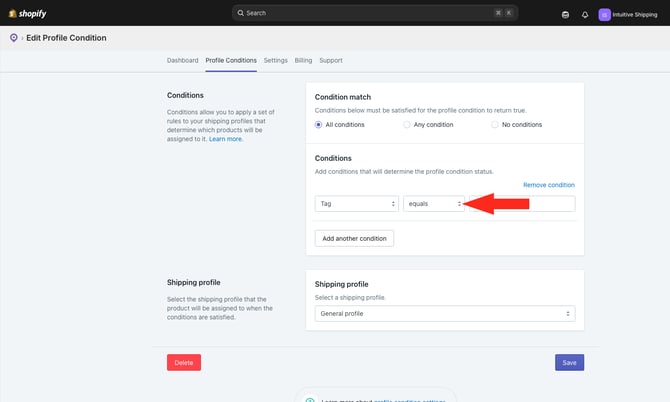
You have up to six settings to choose from. The list of available options depends on the condition type selected in the previous step.
- Equals - The product value must exactly match the condition value you enter in the next step.
- Does not equal - The product value must not match the condition value you enter in the next step.
- Contains - The product value must include the condition value you enter in the next step.
- Does not contain - The product value must not include the condition value you enter in the next step.
- Greater than or equals - The product value must be greater than the condition value you enter in the next step
- Less than or equals - The product value must be less than the condition value you enter in the next step
4. Enter the condition value. Some condition types require you to manually enter a value, such as text or numbers like ‘fragile’ or ‘12’. Others require you to select one or more options from a list, such as ‘Vendor’.
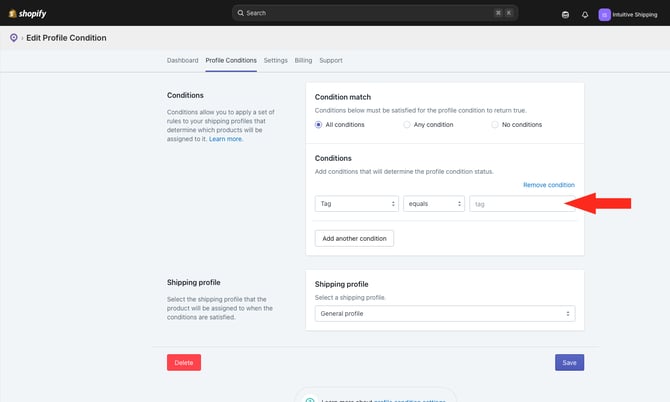
5. To add more conditions, click the Add condition button, then repeat Steps 2 to 4 for each additional condition.
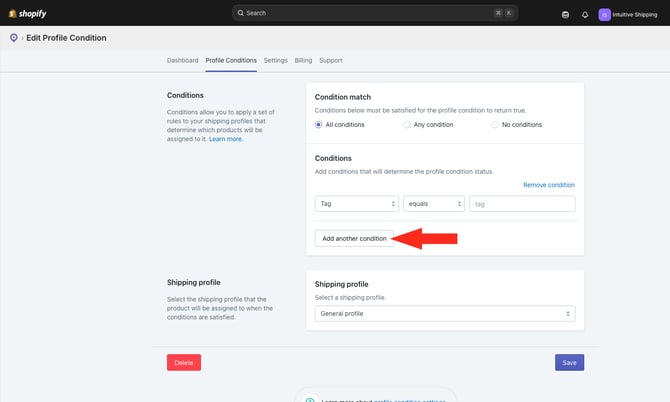
 Be sure that multiple conditions don’t conflict with or override each other, as this can lead to errors with sorting.
Shipping Profile
1. Select the Shopify Shipping Profile that products will be assigned to when they meet the rules defined in the Profile Condition.
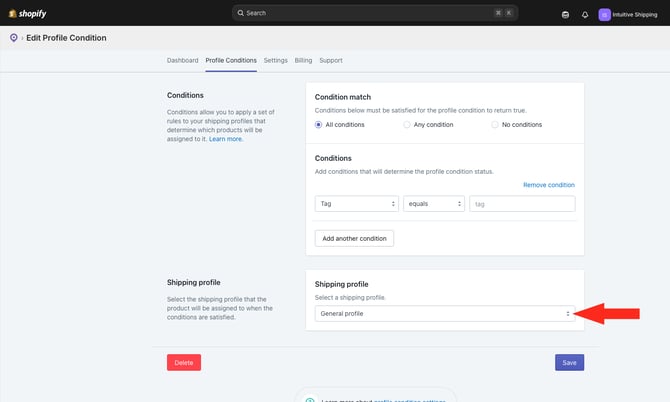
If a product doesn't match any active Profile Conditions, or if the matching Profile Condition is set to Inactive, it will automatically be assigned to your default Shipping Profile.
Learn more about how to set your default shipping profile.
Shopify Shipping Profiles are managed in your Shopify admin, not in Automate Shipping Profiles.
Learn more about Shopify’s Shipping Profiles feature here.
Save Your Settings
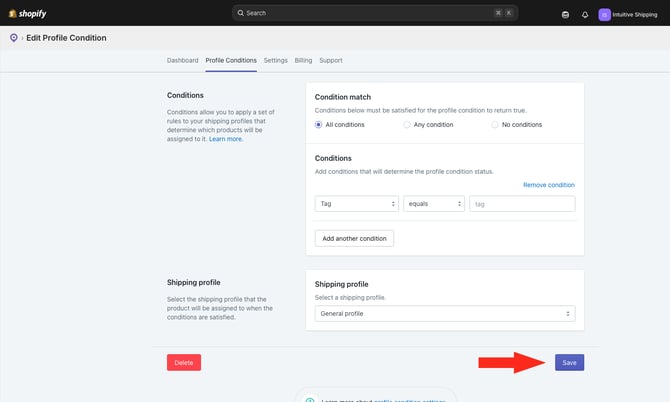
1. Click the Save button to save your Profile Condition settings.
Edit A Profile Condition
To edit an existing Profile Condition:
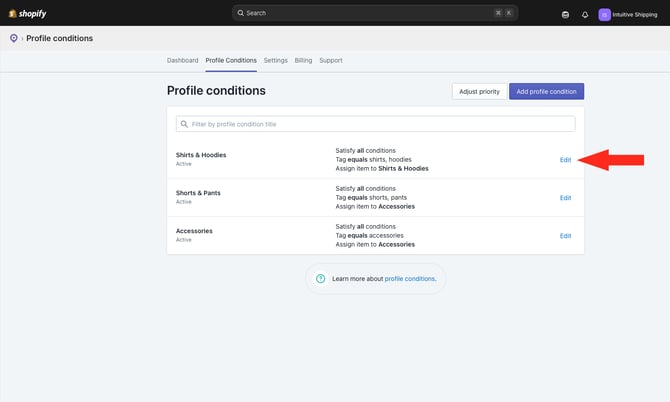
1. Click Profile Conditions on the main menu.
2. Click Edit beside an existing Profile Condition.
Adjust Profile Condition Priorities
Priorities determine which Profile Condition takes precedence when a product matches more than one condition. Priority is set when you configure your Profile Conditions and lets you control which Shopify Shipping Profile a product is assigned to when multiple conditions apply.
For example, you might have these Profile Conditions in the following priority order:
- Shirts & Hoodies: Matches products tagged 'shirts' or 'hoodies'
- Shorts & Pants: Matches products tagged 'shorts' or 'pants'
- Accessories: Matches products tagged 'accessories'
- Holiday: Matches products tagged 'holiday'
Some of your holiday-themed shirts and accessories may qualify for special holiday shipping during certain times of the year and also have the 'holiday' tag. By moving the Holiday Profile Condition to the highest priority, any product tagged 'holiday' will be assigned to your Holiday Shopify Shipping Profile, even if it also matches another Profile Condition. When the promotion ends, simply restore the original priority order to sort those products back into their usual Shopify Shipping Profiles.
You can change the priority of a Profile Condition from either the Profile Conditions list or the Edit Profile Condition page.
Changing the order on the Profile Conditions list by following the steps below automatically updates the numerical Priority value. Likewise, changing the numerical Priority setting value on the Edit Profile Condition page automatically updates its position in the Profile Conditions list. Both methods stay synchronized.
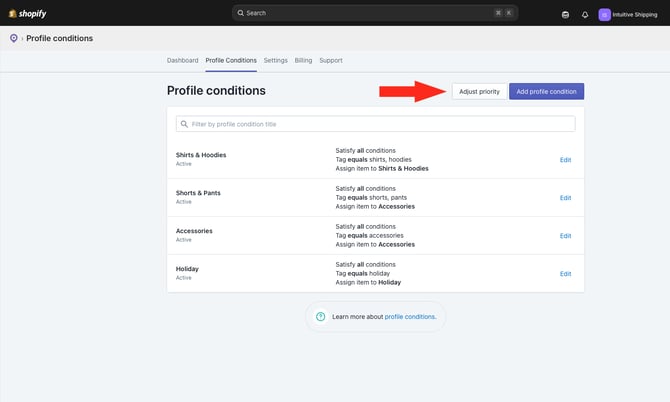
1. Click Profile Conditions on the main menu.
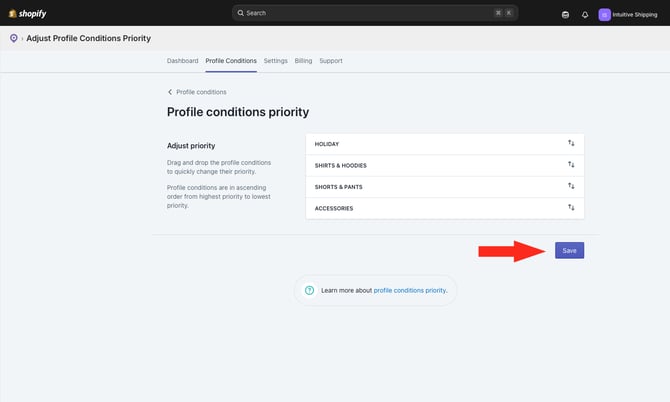
2. Click the Adjust Priority button.
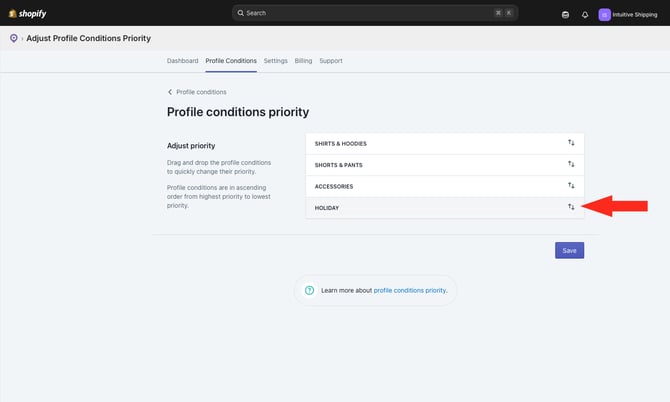
3. Drag and drop your existing Profile Conditions into the desired order. For this example, we're moving 'Holiday' from fourth to first.
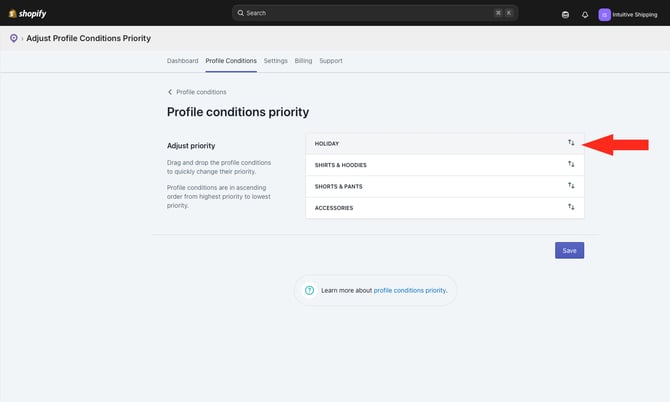
4. Click the Save button to save your adjusted priority sequence.
Activate Profile Conditions
Each time you create or modify a Profile Condition, you must run a Bulk update to apply your changes. Until a bulk update is completed, any new or updated Profile Conditions won't take effect, and products won't be sorted according to your latest configuration.
Learn more about how to run a bulk update.